Manually Moving Devices
There are several occasions when you may want to manually change the relationship between the devices shown on the IntraVUE™ browser dispaly.
- You want to show non-IP address devices such as a copper to fiber media converter.
- You want show non-Ethernet devices such as serial devices that are connected through an Ethernet-to-Serial converter.
- Unmanaged switches used to require manual moves but starting with version 2.0.5 can be configured conveniently. See Configuring Unmanaged Switches
When logged in as Admin, the Device menu provides two functions to accomplish the above: Add Child and Move.
Add Child
This adds a new node under the selected device. This is typically used for devices connected via linking devices. The properties of the new node can be changed to reflect a device which is in the network but not visible to the scan engine. Typically, the other devices that are physically connected to the inserted node will be moved graphically to the new node using the MOVE function. An event log entry is generated for this operation.
There will be a black line connecting the new node. It will stay black unless an IP device is moved under it. The initial name of the new node will be 'N/A' (in caps to discriminate between automatically inserted nodes which are named 'n/a' in lower case).
Move
Move allows the user to change the parent of a device.
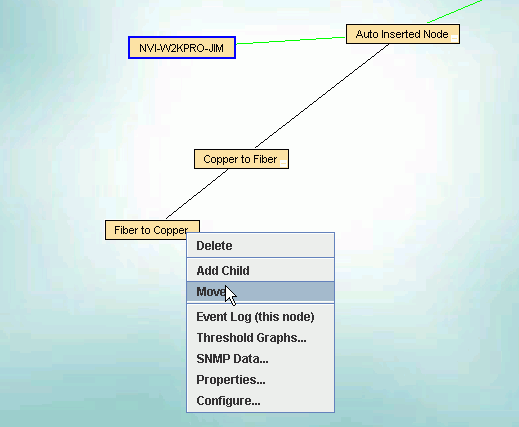
To make a move, first select the device you want to move. It will get a blue outline. While the device is still selected, right click on the parent device to which you want to move the device and select Move. An event log entry is generated for this operation.
Example of adding Media Converters
Media Converters typically do not have IP addresses. They may take the copper CAT5 cable and convert it to fiber or even wireless. A second device typically converts the signal back to copper.
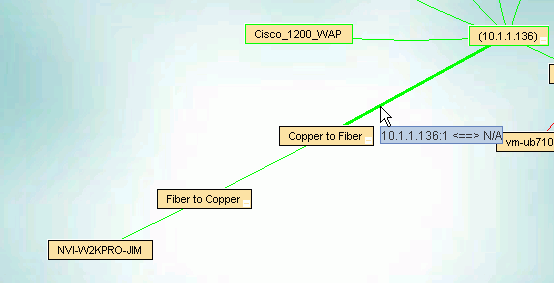
When doing this it is desirable to have the port of the managed switch be maintained. In the image below there is a port number for the line connecting the device.
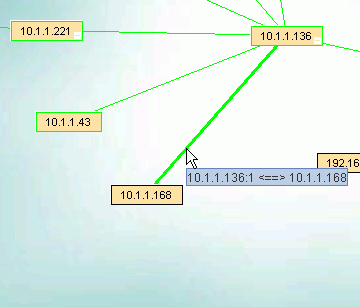
Use Add Child and add a child first to the device, and next to the just added child. You now have two unnamed child devices under the original device.
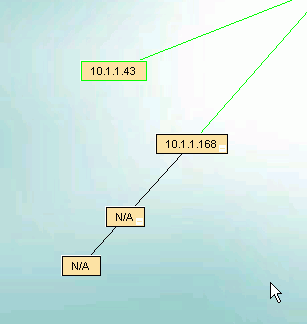
Now Delete the device with the IP address.
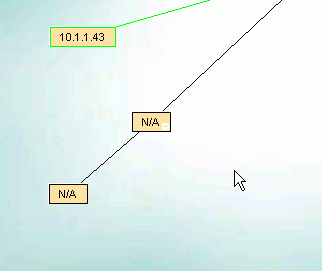
It will be rediscovered and become a child under a NEW auto-inserted node, at its original location. Next select the device (it gets a blue outline) and use Configure on the lowest child to MOVE the device below that node.
The auto-inserted node will go away, the connecting line to the first node will still have a port number, and the additional device nodes will help you understand you network when problems arise.
Example of Configuring a Bridge
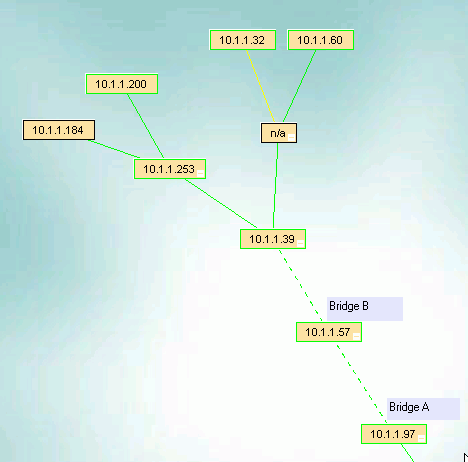
In the image below, the .97 and .57 devices have been discovered as wireless bridges. IntraVUE™ will not know which ip address is on the IntraVUE™ side of the network so you could find either one as the parent.
The devices on the other side of the bridge will appear under the top bridge, along with the other end of the bridge.
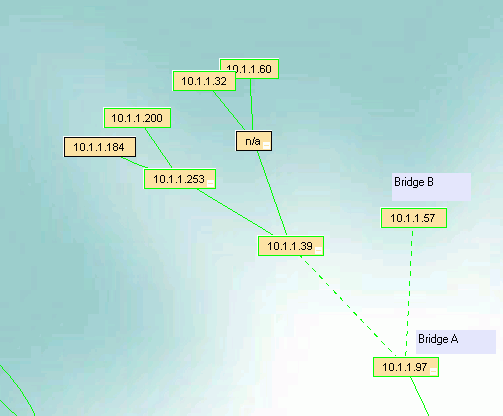
In this case, the .97 is on the IntraVUE™ side and we want the devices, starting with the .39, to appear under Bridge B, the .57, needs to get the devices so we use the Move instructions above. Select the .39 so it has a blue outline, then right click on the device you want to move to, the .57, and pick Move.
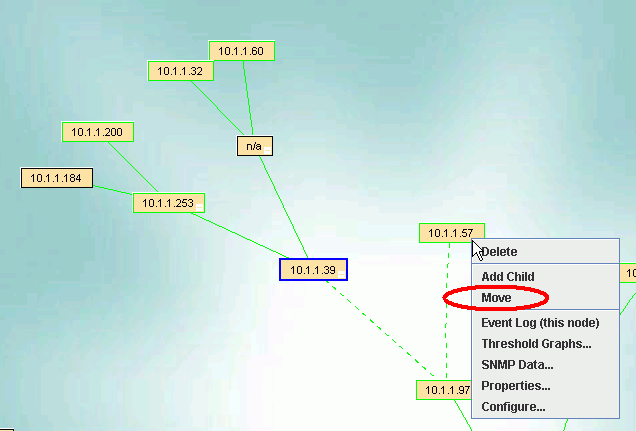
The devices on the other side of the bridge will now be under the .57.
