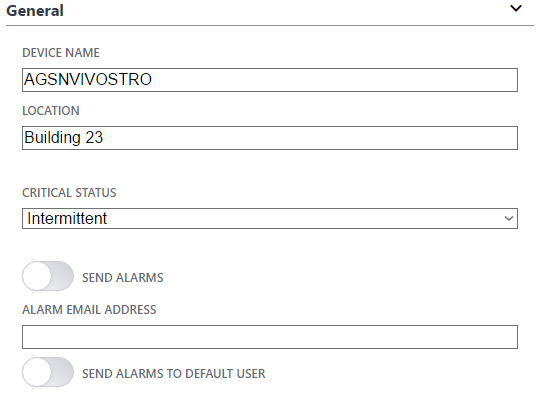
Device Configure - General Tab IntraVUE™ 3
Click on any device to access the device properties.
![]() Admin VerificationWhen this is checked, the position of the device is frozen or locked to its current position. If the device is moved, the IntraVUE browser will show a red filled circle at the verified position and a tan circle at the current location of the device. See a complete description about Admin Verification in IntraVUE 3 and its benefits.
Admin VerificationWhen this is checked, the position of the device is frozen or locked to its current position. If the device is moved, the IntraVUE browser will show a red filled circle at the verified position and a tan circle at the current location of the device. See a complete description about Admin Verification in IntraVUE 3 and its benefits.

You can also remove "Admin Verified" when you click again on the same button "Remove Admin Verify".

Click 'Edit' to access this tab.

Starting at the top:
The IP address name is set when a device is initially discovered and it can not be changed, even the 'n/a' nodes.
If a name is not configured for a device, the IP address will be displayed.
Send Alarms
If checked, any email alarms created by this device will go to the email address in under the button ''Send Alarms''.
To enable a large number of devices you can use the Export/Import technique using a spreadsheet.
Send Alarms to Default User
This button activates the default email of the user that gets email for this particular device. The "Enable Email" checkbox must be enabled and email SMTP server gateway must be previously configured under Configure > Email for this to work.
NOTE
You can have IGNORE SNMP DEVICE NAME or IGNORE SNMP DEVICE LOCATION checked and the scanner will not use SNMP to get a device's Device name and/or Location field. SEE Device Configuration - SNMP Tab
This is important for some devices which respond to SNMP but do not have a name or location configured.
Enter the value you want to use instead of what the device reports from SNMP.


